Chaotica: Linear Latitude
Tutorial Jump List
Welcome to another guide on Chaotica. If you haven’t seen the other tutorials yet, here they are.
- Chaotica: An Introduction
- Chaotica: Edit the World
- This tutorial.
Introduction
In the previous tutorials you’ve learned how to use the basics of Chaotica. In this tutorial, I’m going to show you how to create a basic linear tile.
Creating the Thing to Tile
Start off with creating a new empty world.
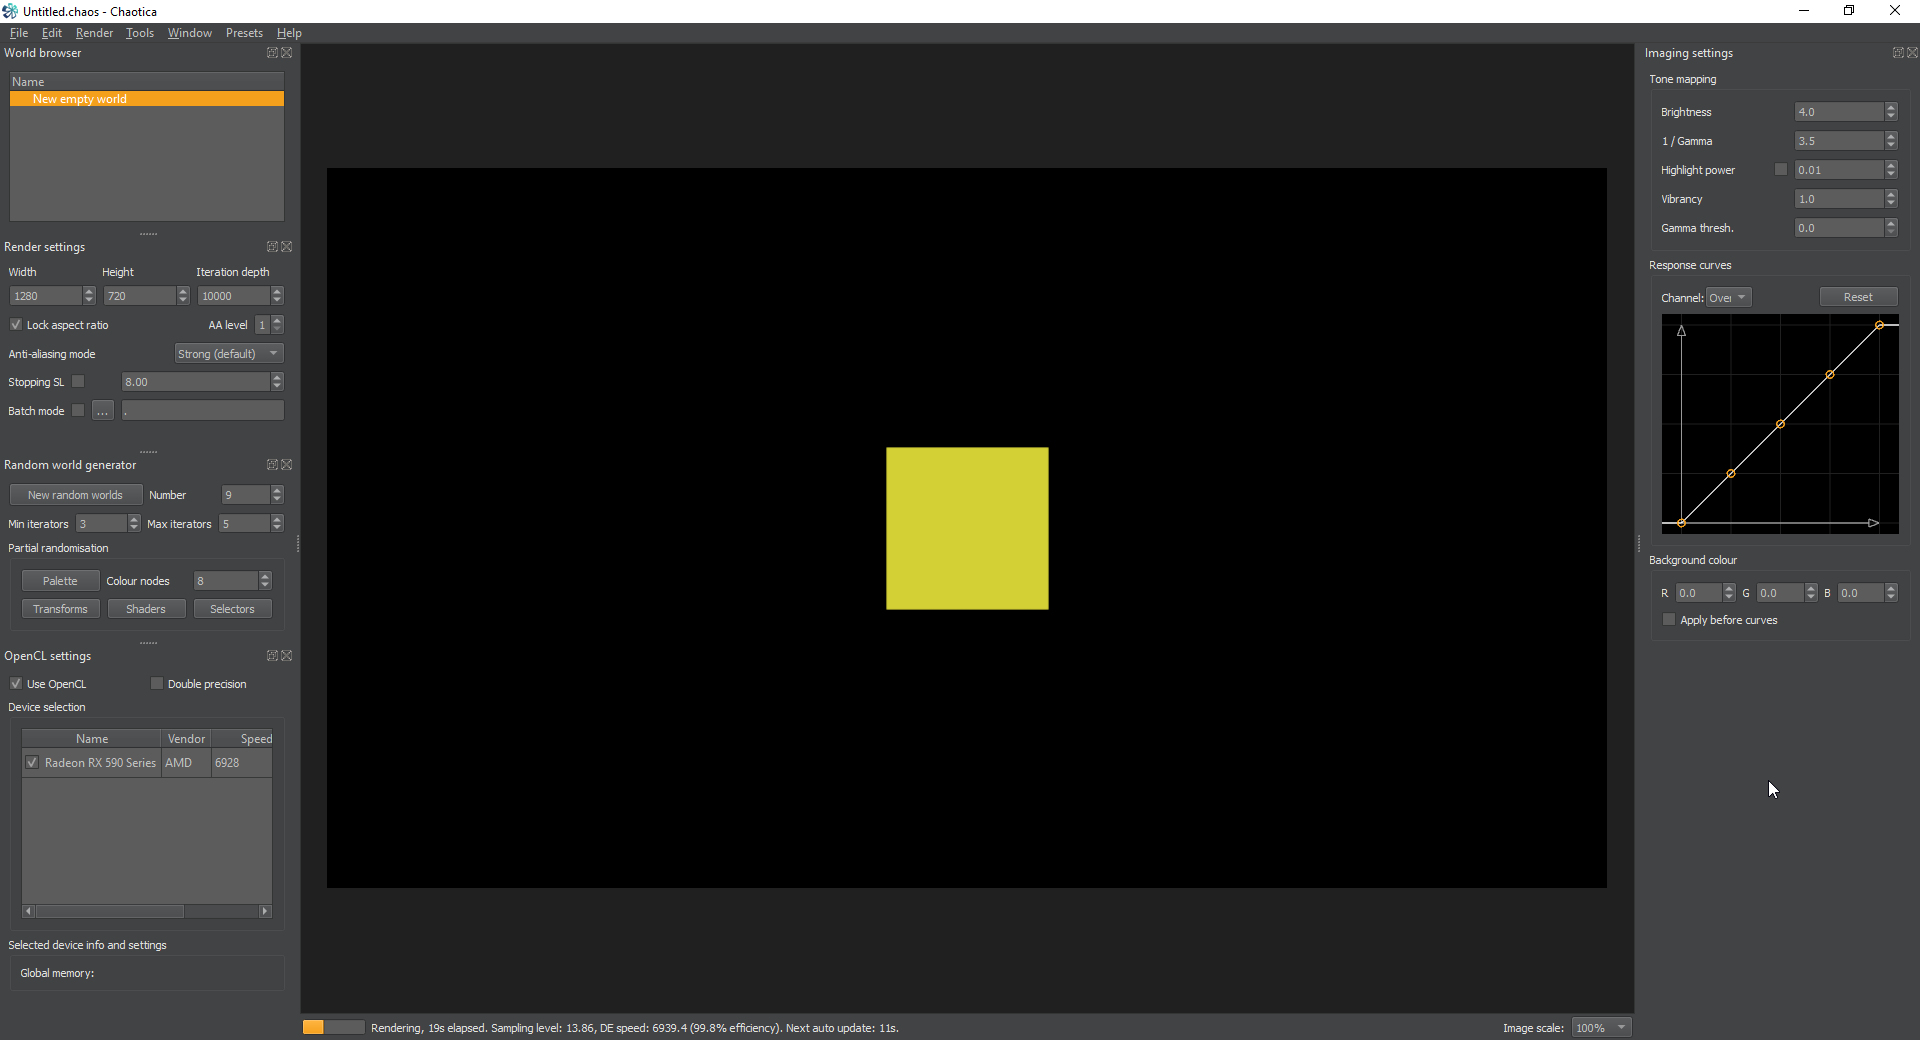
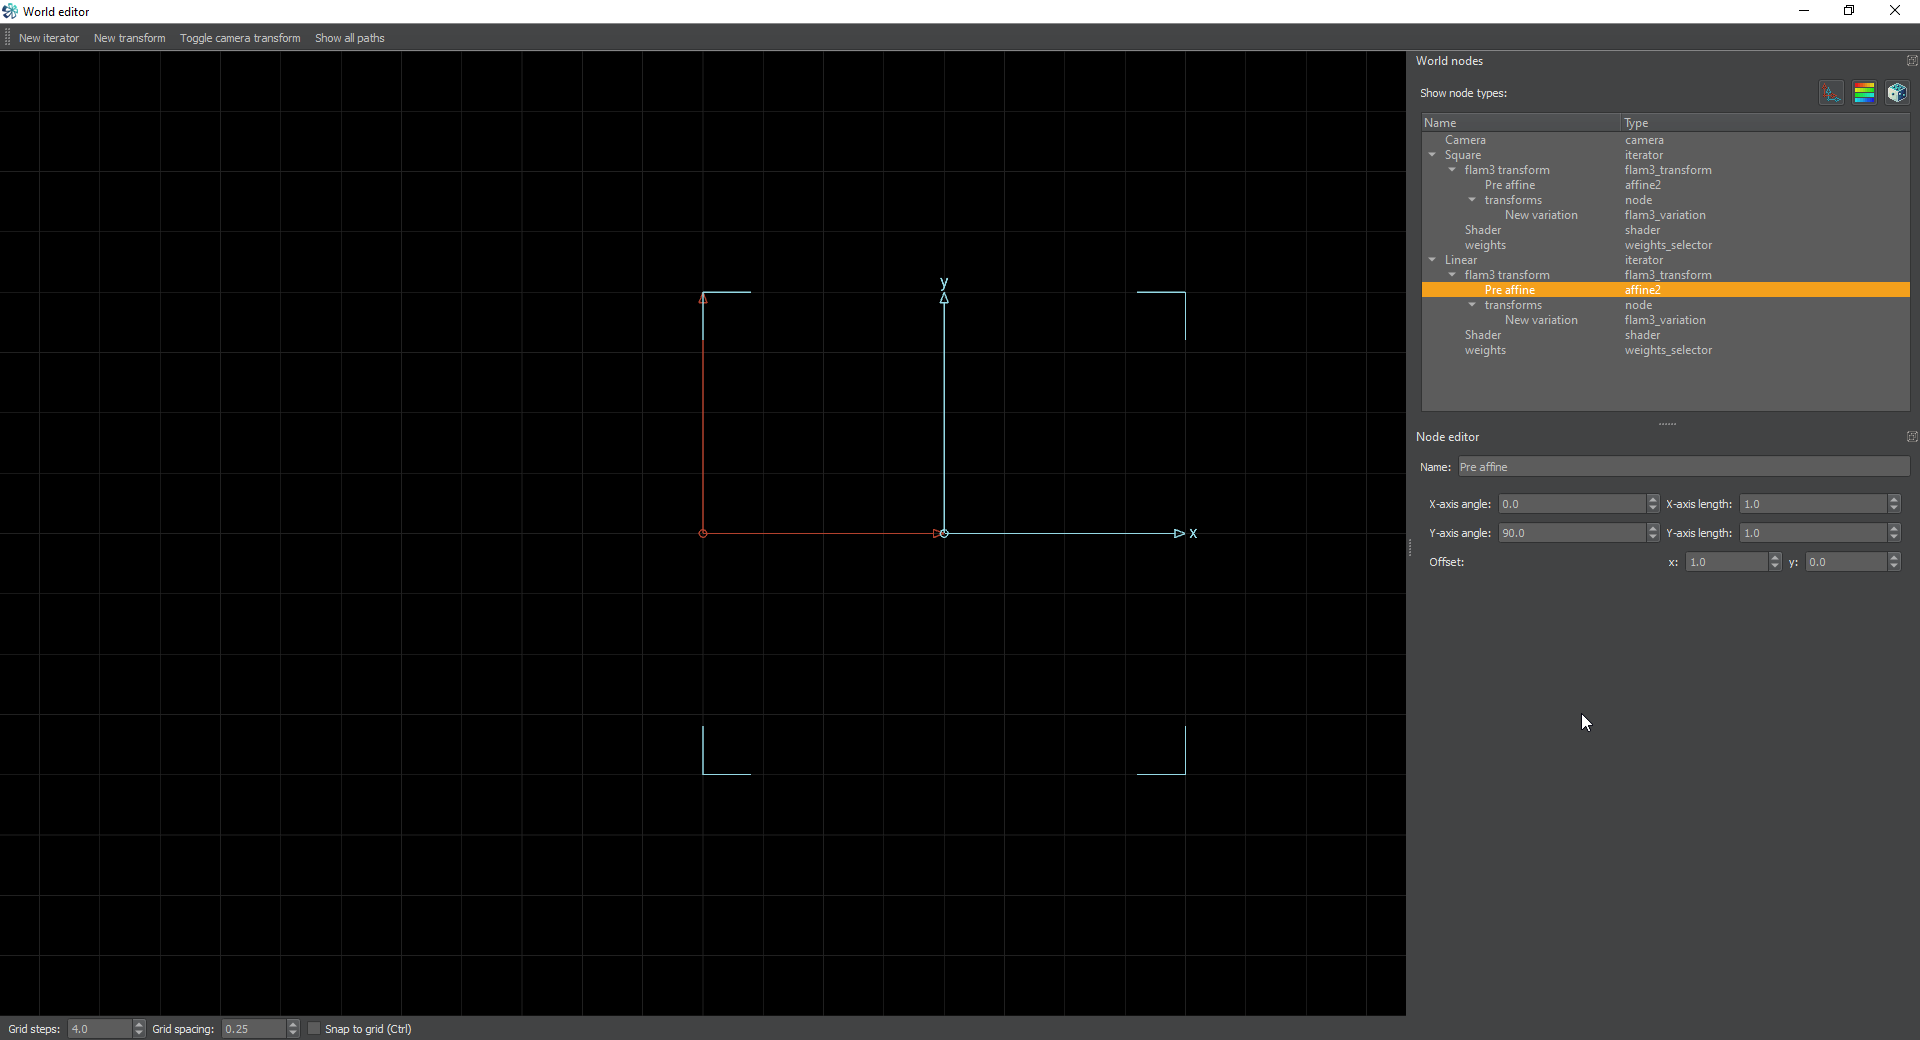
Next, open up your world editor. A linear tile starts with a linear transforms. It doesn’t really matter which order you put them in, but for the sake of the tutorial, I’ll start with a square so you can see what happens as we go along.
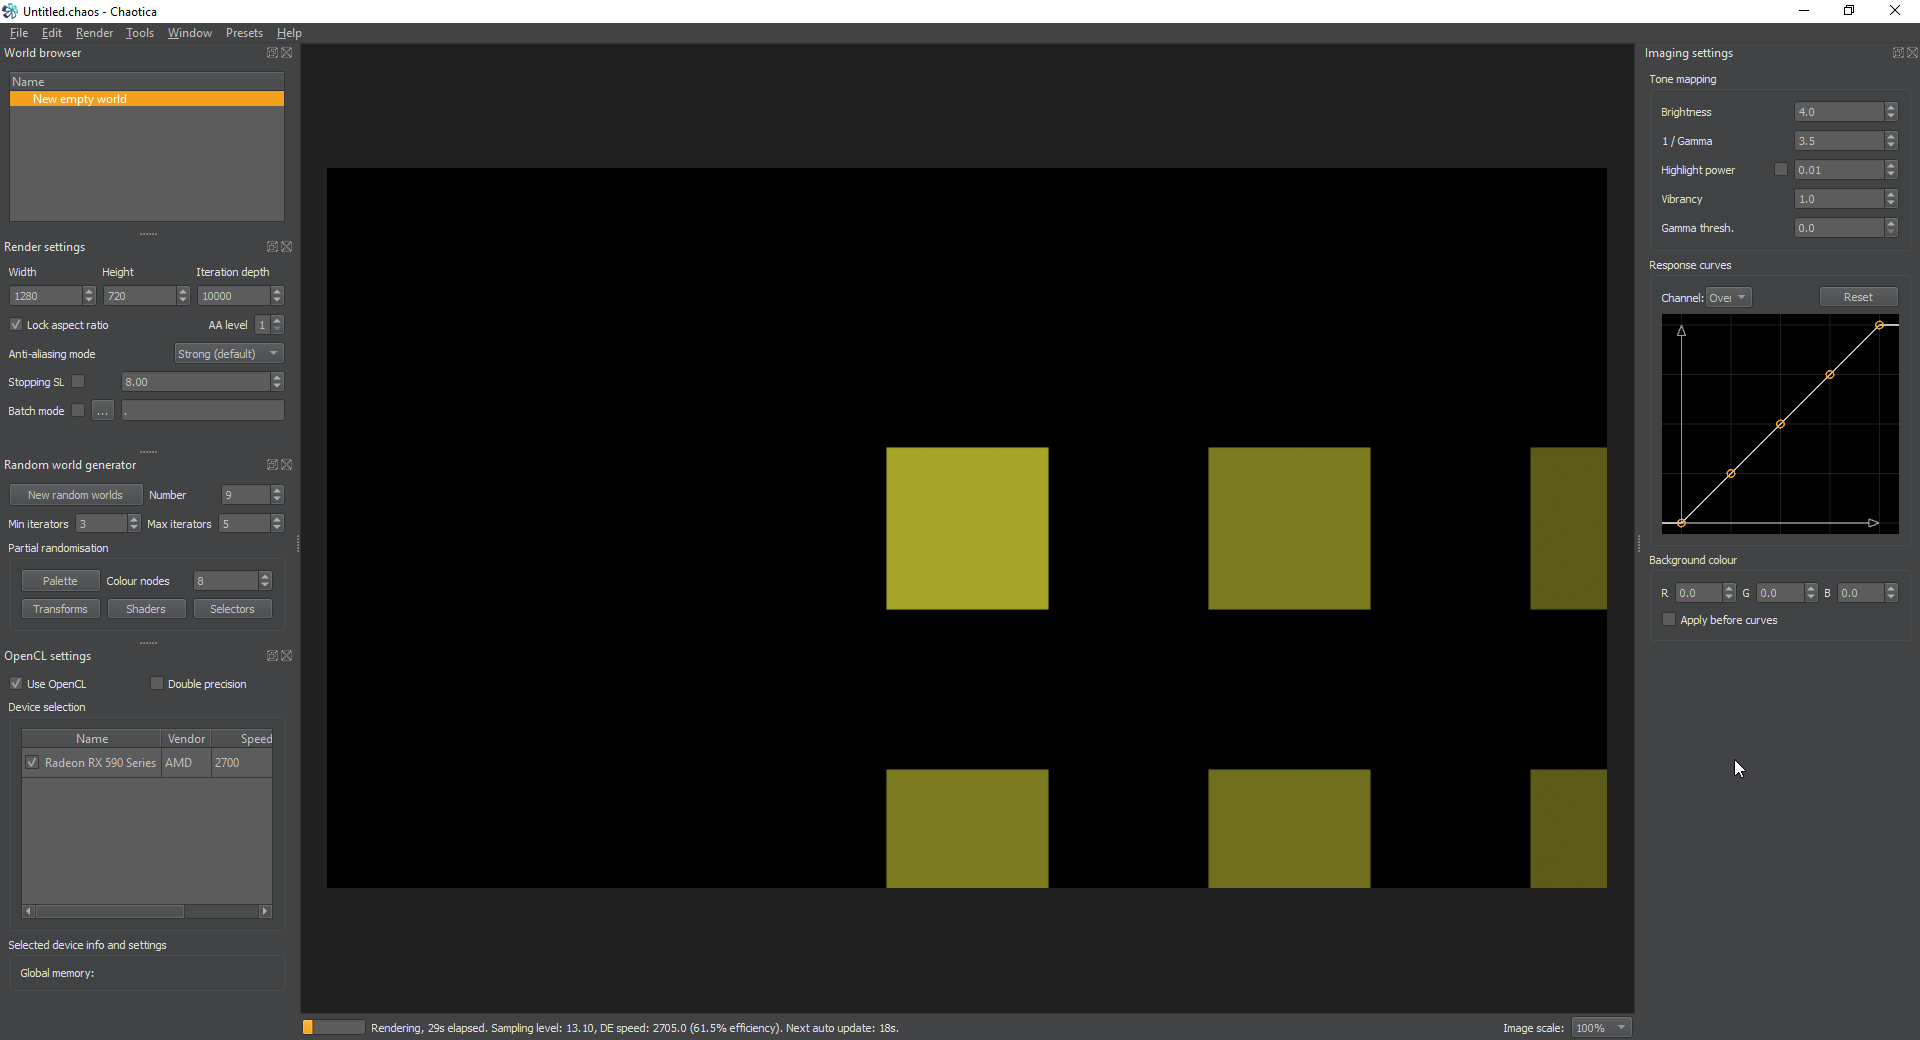
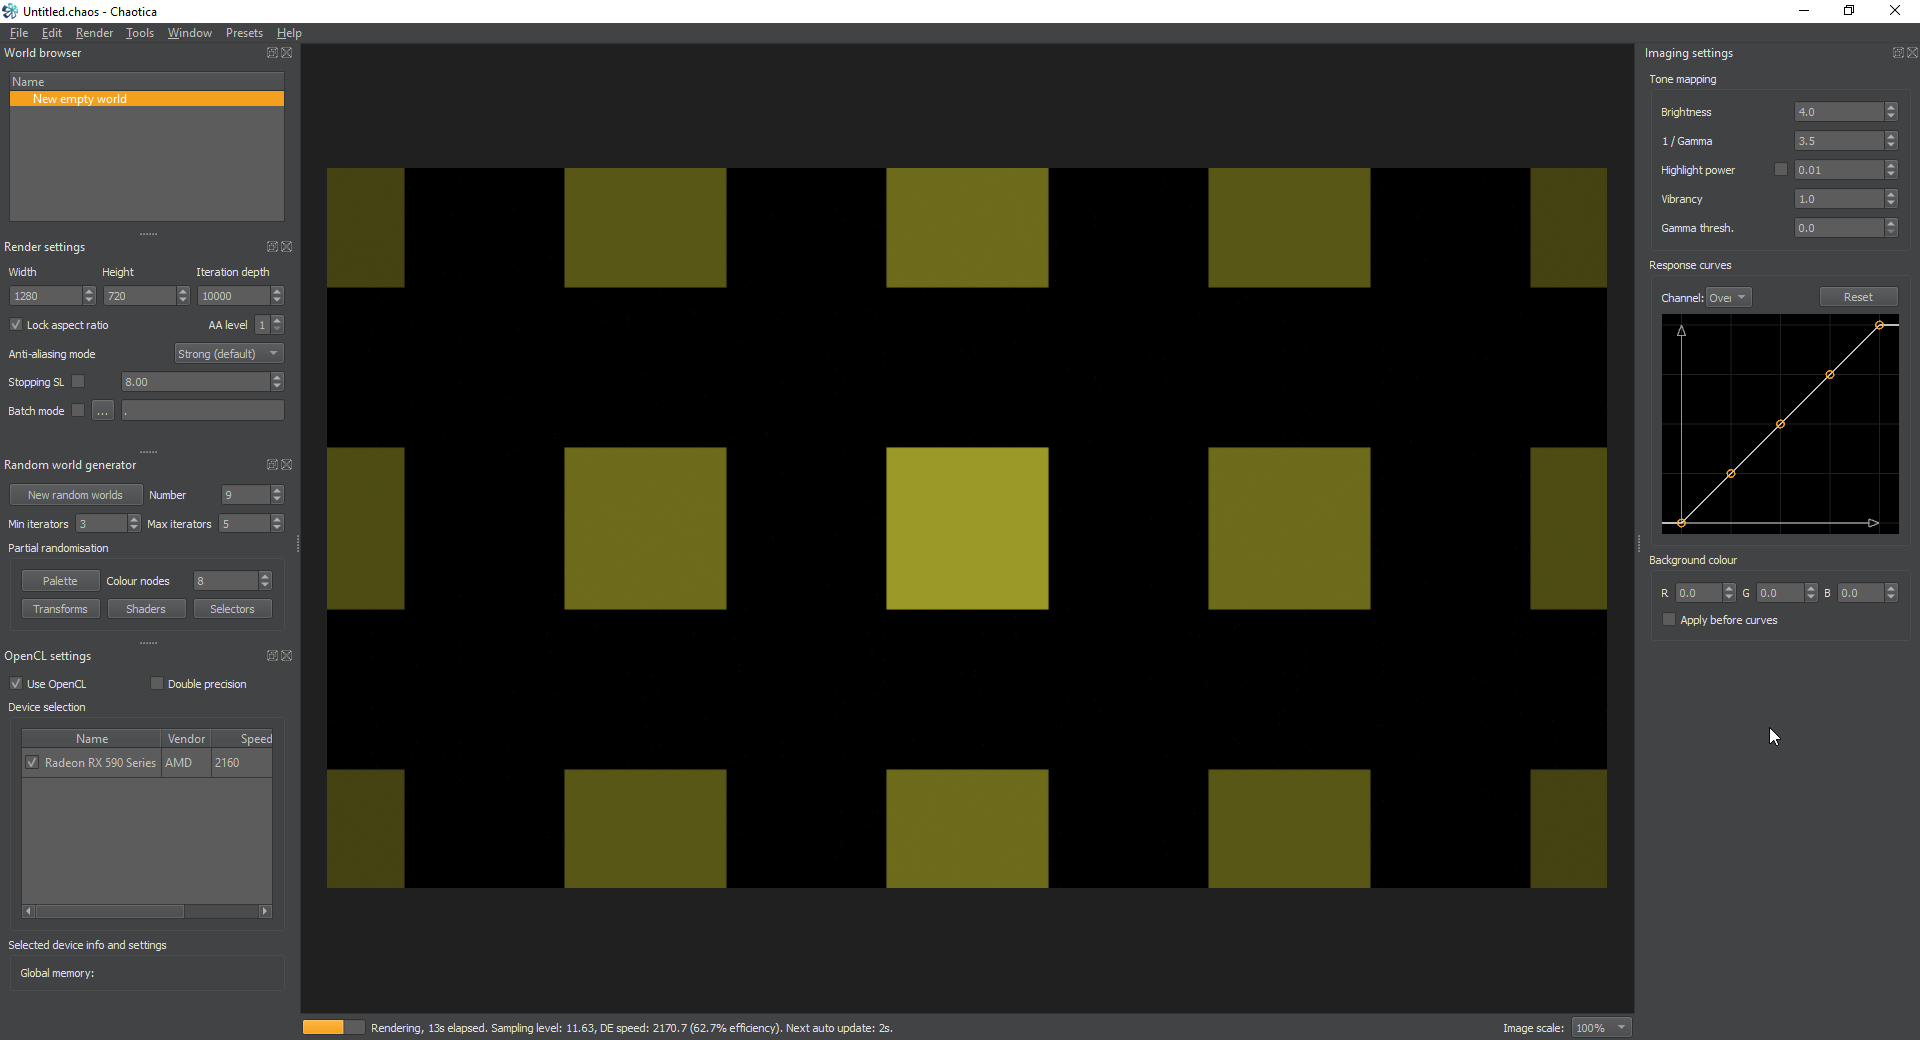
Go ahead and create a new iterator, and then open up it’s transform node and create a new transform. Make this a square transform and set the value on it to 0.5
This is what the main window will look like now.
Setting up a tiled plane
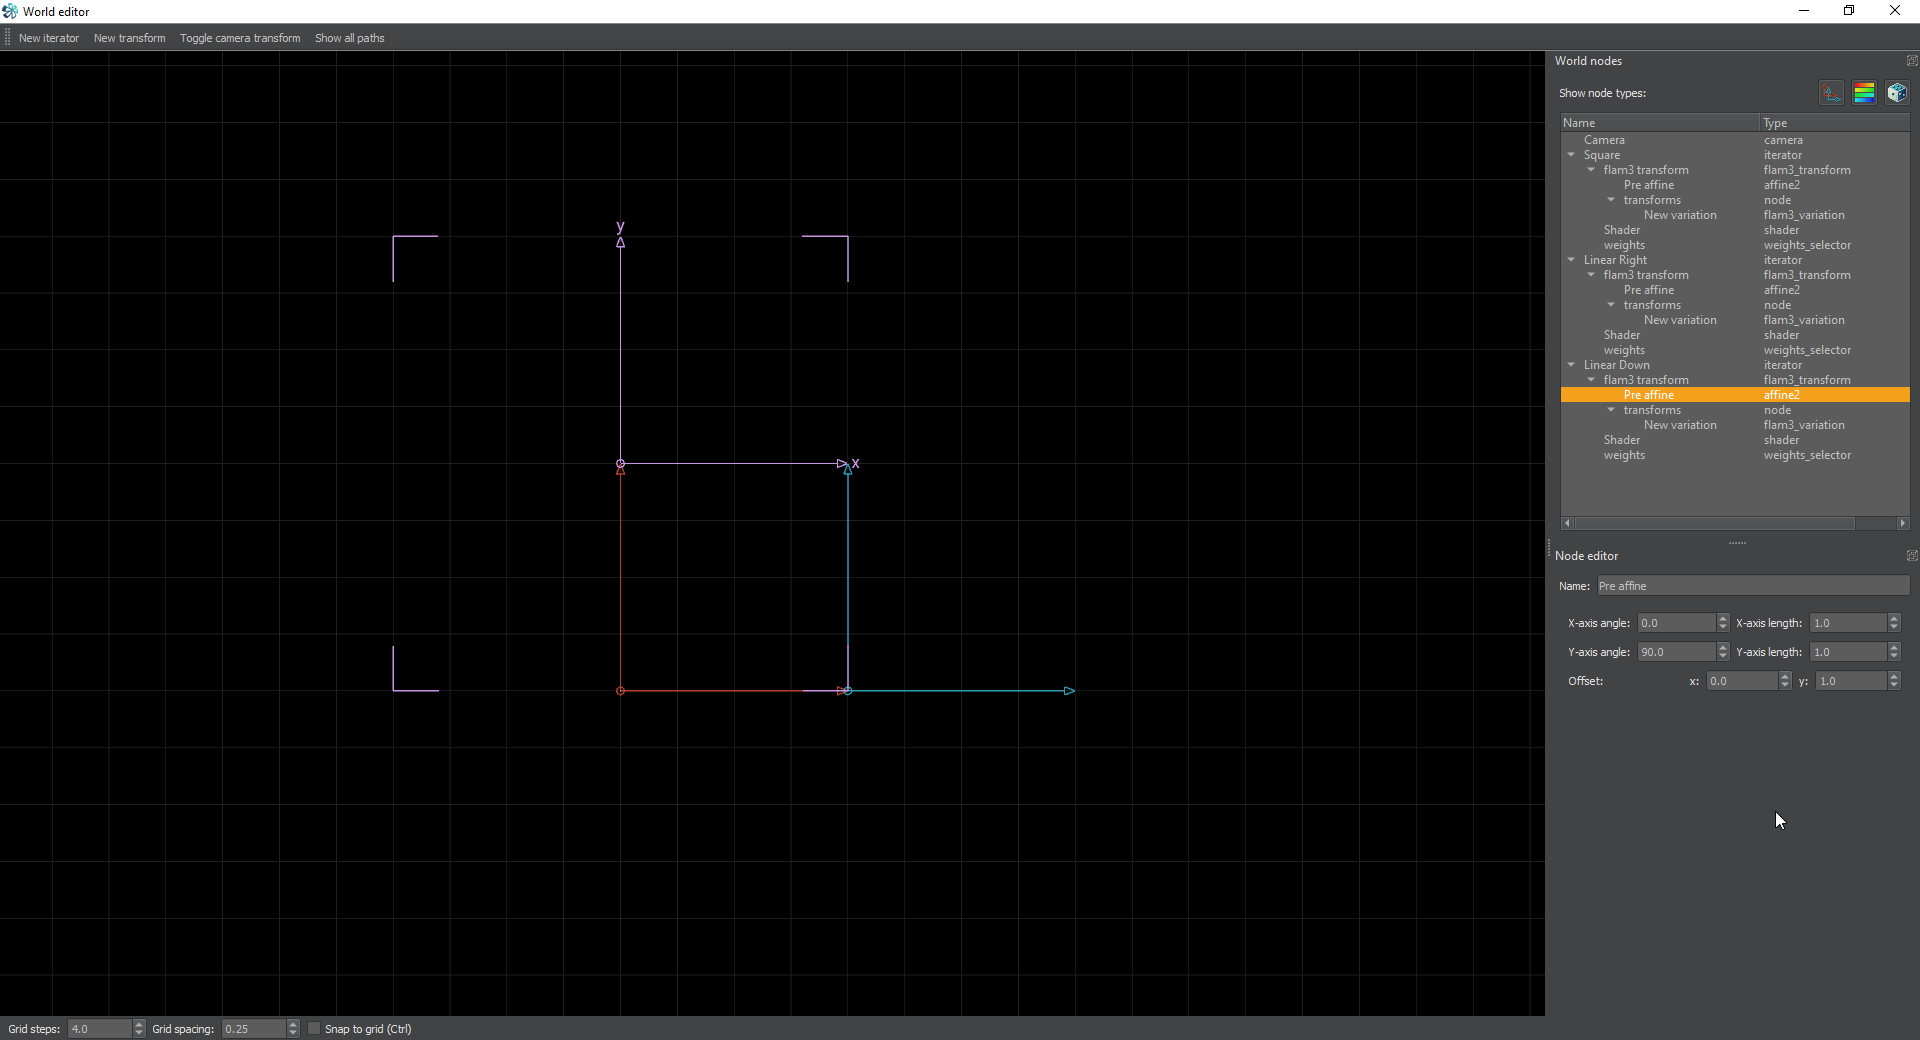
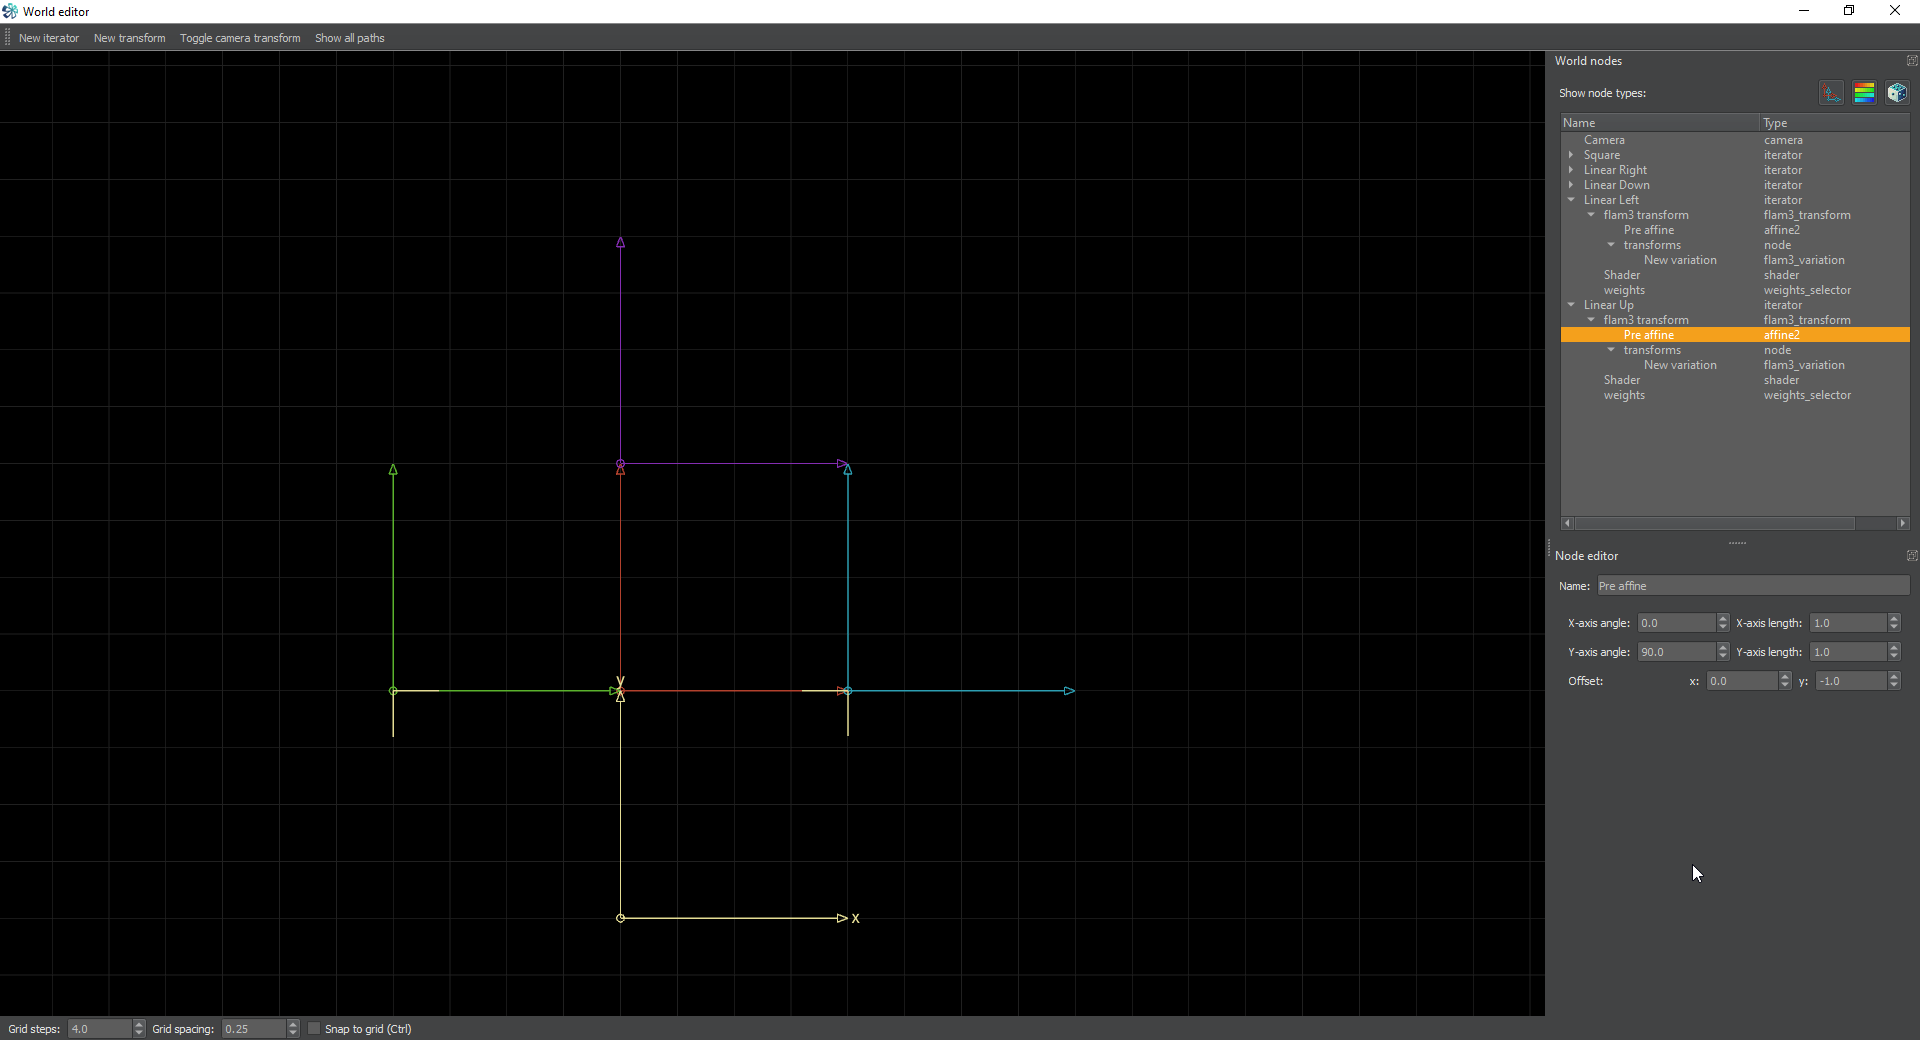
Now we’re going to setup a basic linear tile. A linear transform “moves” the whole in a direction from the origin. That’s not exactly what happens but it’s a simple enough explanation to get an idea of how it interacts. I’m going to create another iterator and add a linear transform to it. Then I’m going to go to the pre affine and offset it by 1.0 in the x axis.
This is the editor window now, and the main window so you can see the change.
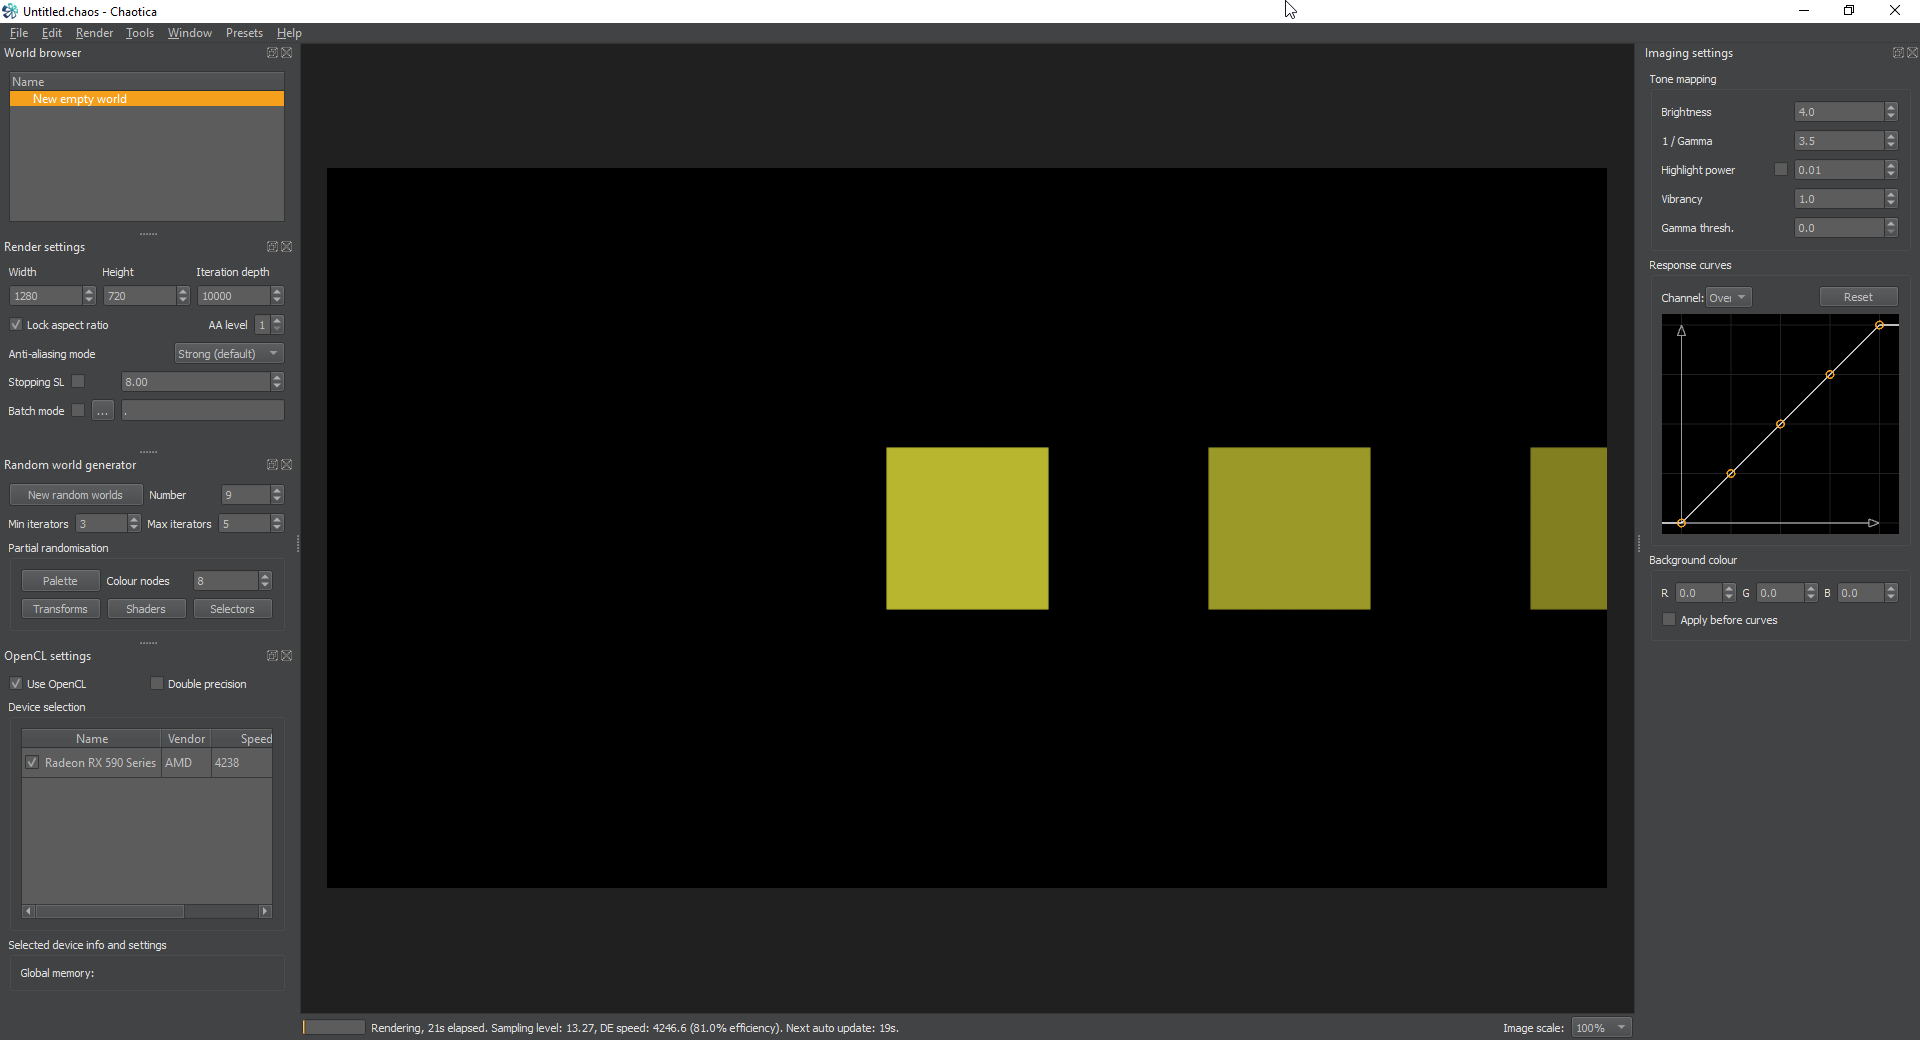
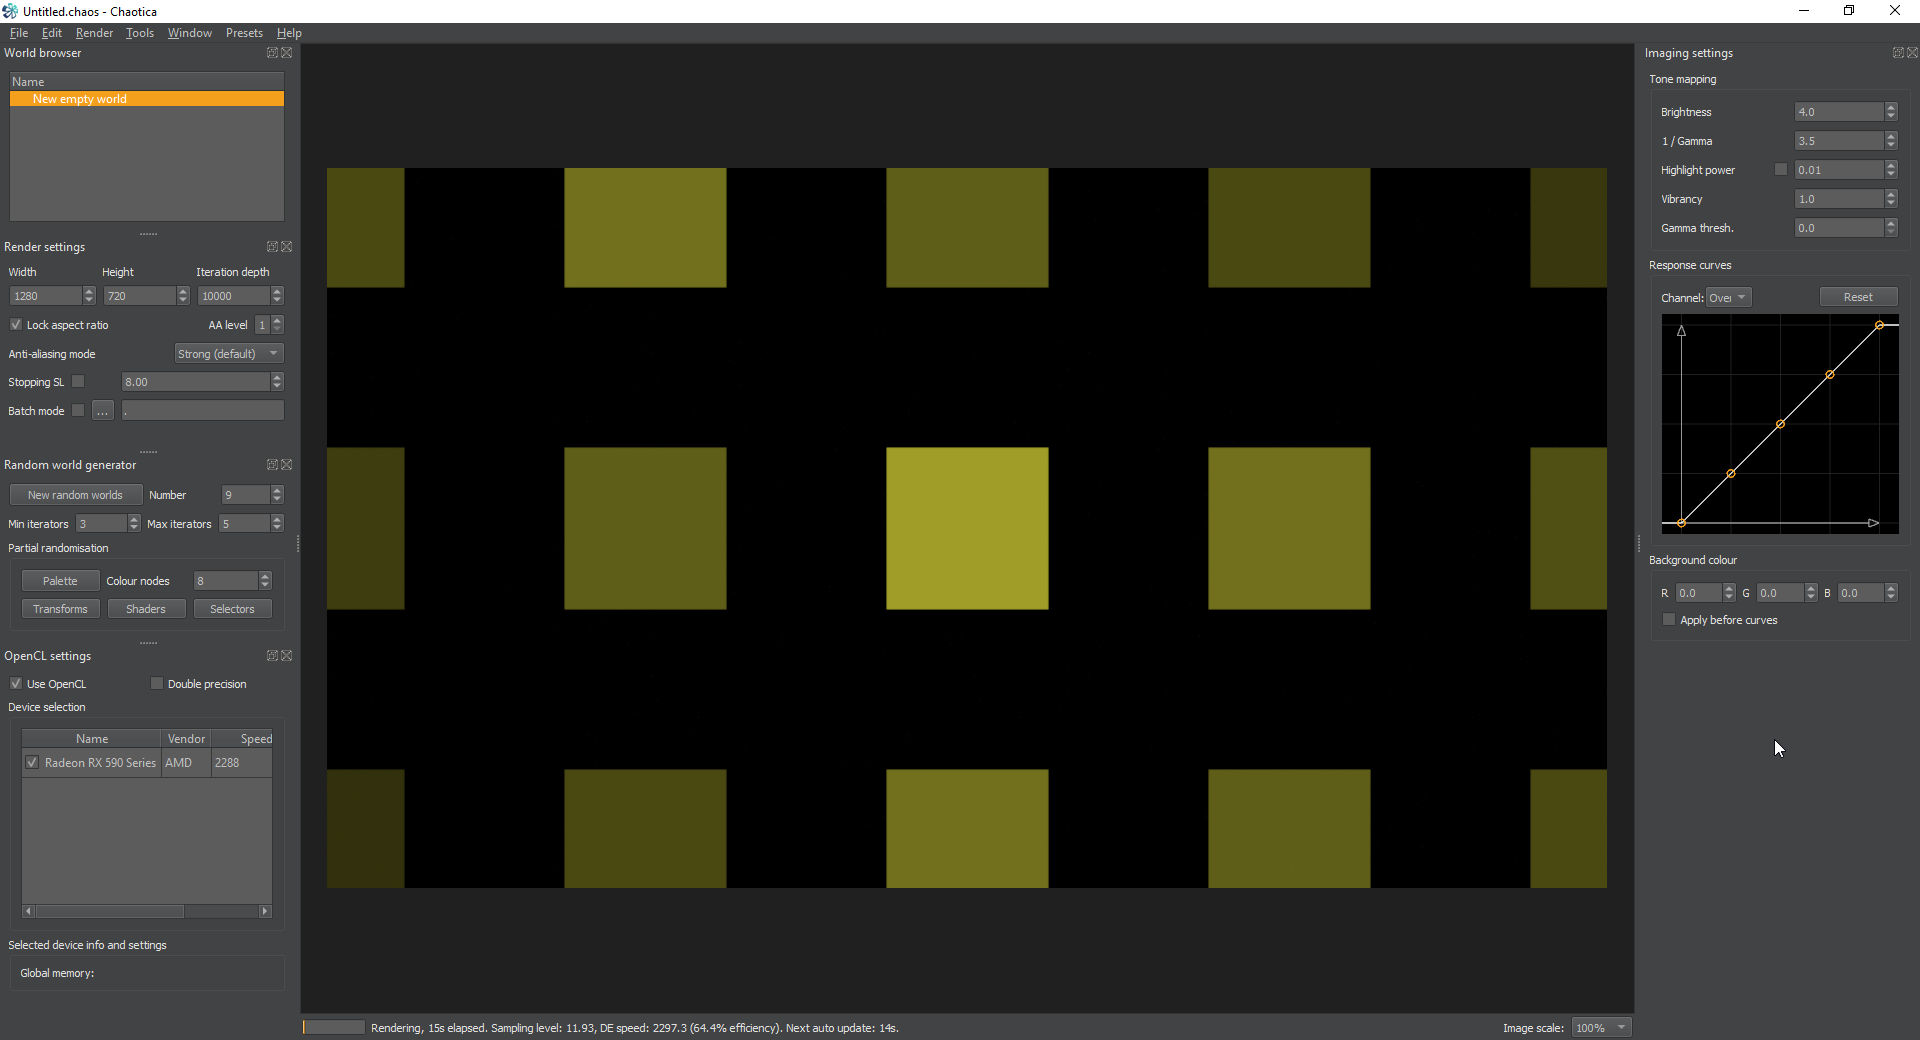
As you can see the initial square is now copied to the right. I’m going to create another linear iterator, and copy it up by 1, or 1.0 offset in the y axis.
Note: in the current version of chaotica 2, a 1.0 offset actually moves it down instead of up. The values are inverted.
Now the whole thing has been tiled both right and down. You could add another two linears in the other two cardinal directions, but because of the way it works, you only need one more really. I’m adding yet another linear iterator and this time offsetting the x-axis by -1.0 and the y-axis by -1.0 This tiles the rest of the iterators in all directions.
Now, we have a nice field of squares. Yay! this is a basic linear tile. However, I’m sure you came to this tutorial for more than just that. Lets make it look a lot more fun.
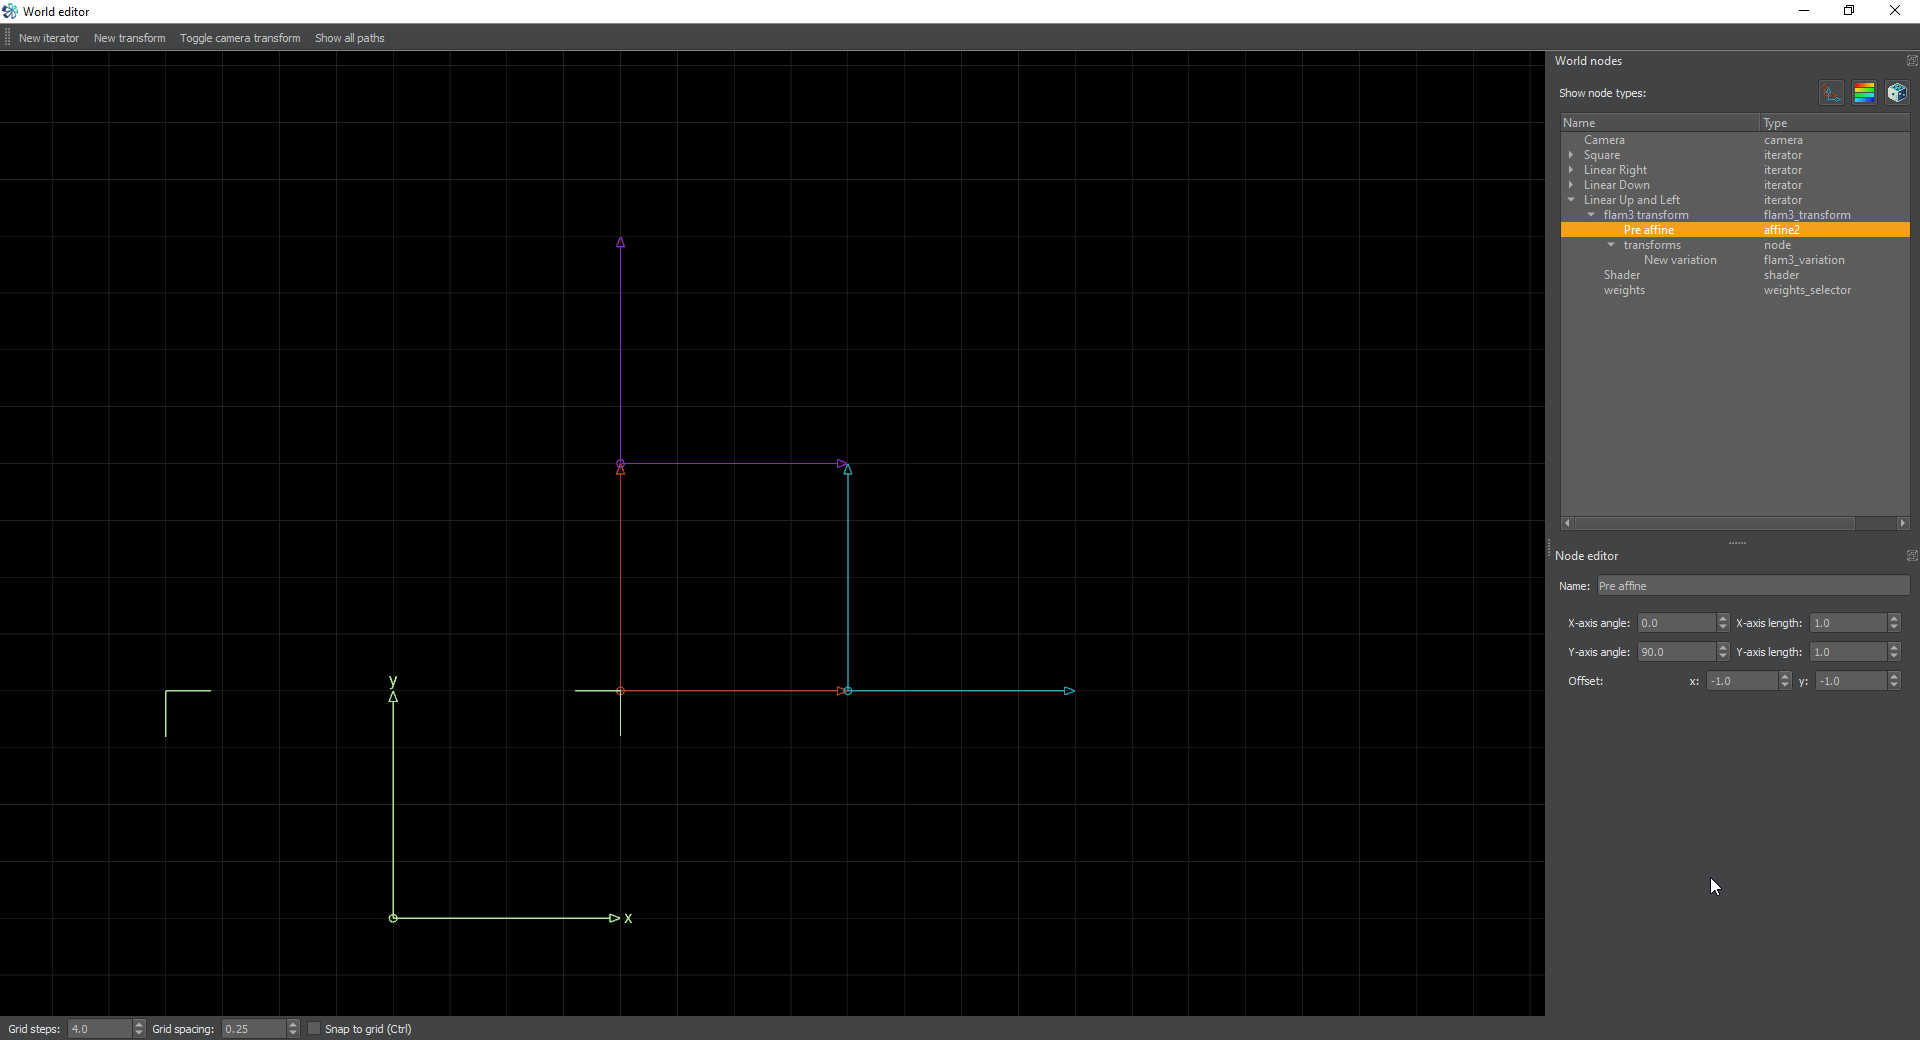
For the sake of simplicity, I’m going to go ahead and move the third linear iterator back up one, and create a fourth for the other cardinal direction.
Weights
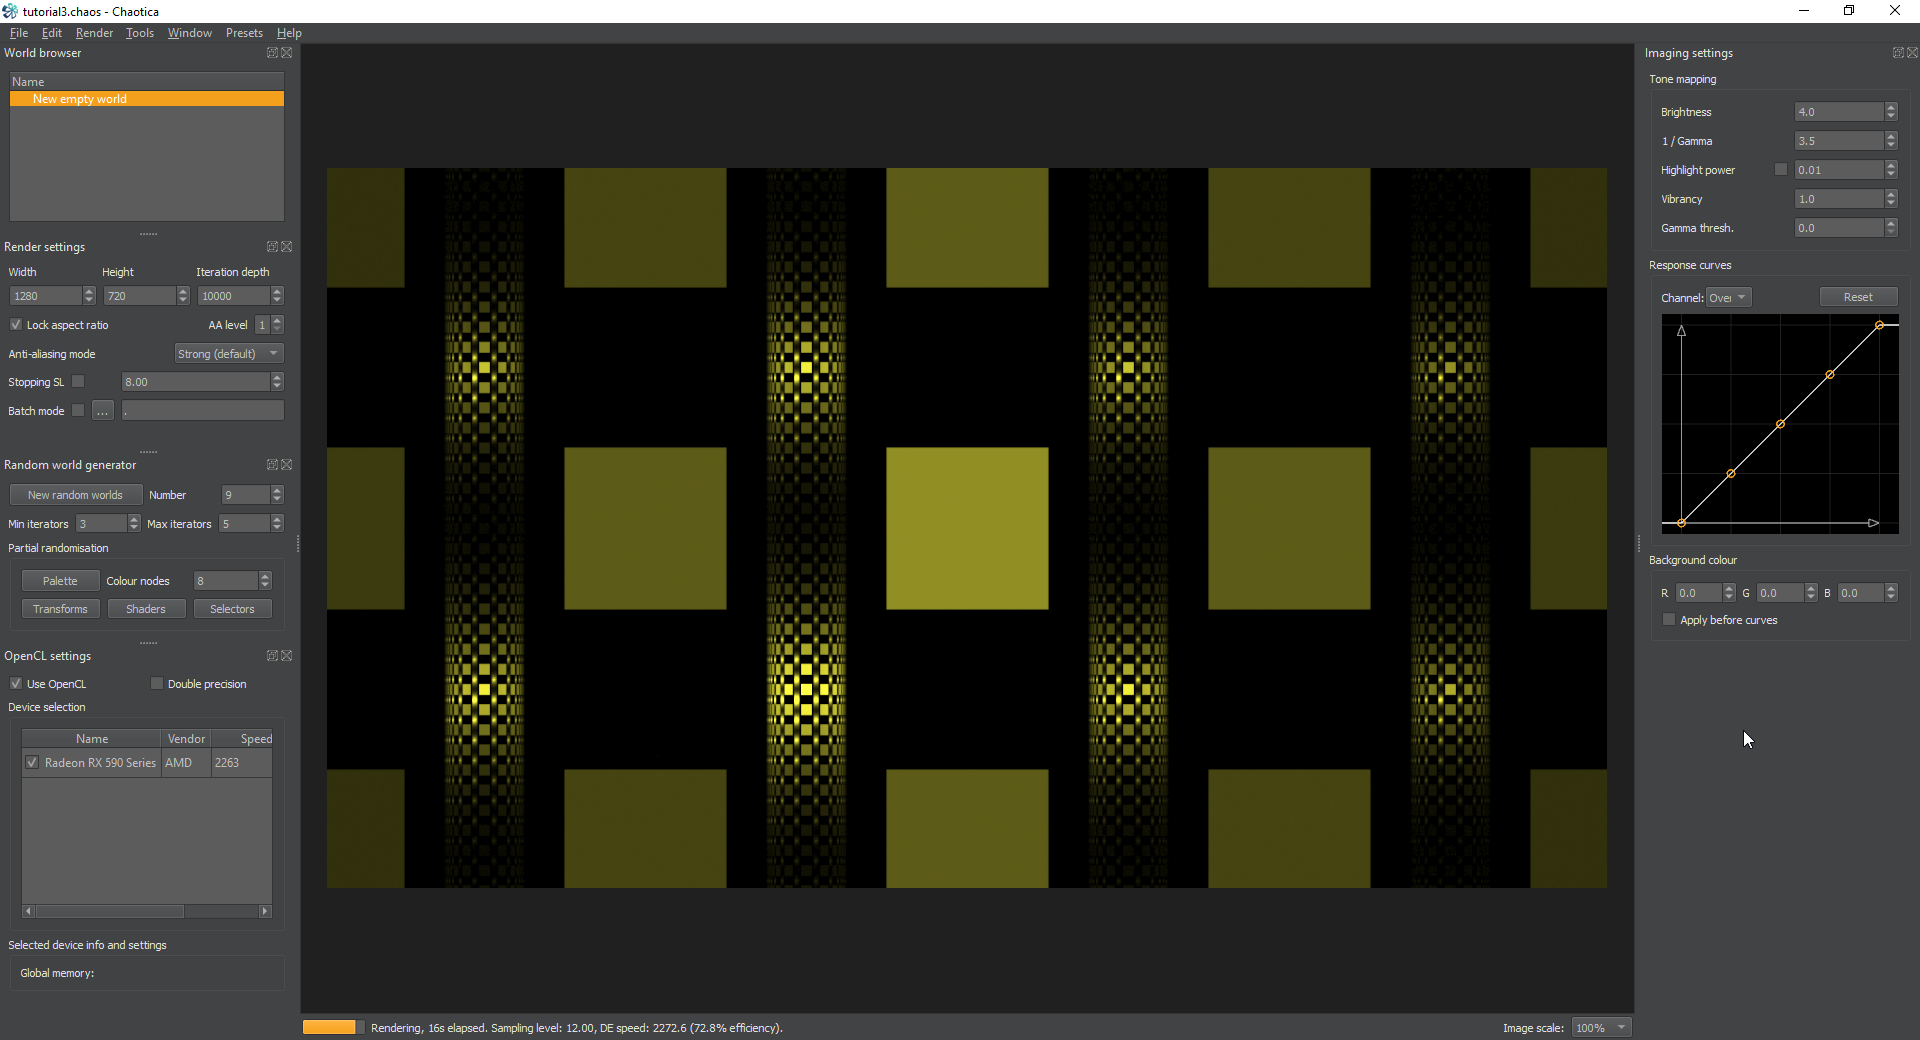
Now, notice how the center is bright and the rest are dark. That’s normal and can be adjusted a bit using weights. You can raise the base weight of the linear iterators to increase the brightness. However, there’s a lot of empty space in there. Lets add some cylinders.
Before you start though, I’m going to recommend you go back through and name your iterators so you know which one is which. It’s a habit I’m still trying to get into and will save you time later on when you’re hunting for something. Next, make sure you remember to save. I find it’s a huge time saver to create a series of basic tiles and transforms that I can go back to later and tweak from that point.
Filling in the blank spots
To start off with, I’m going to create a cylinder2 transform in a new iterator. I’ll set the value to 0.25.


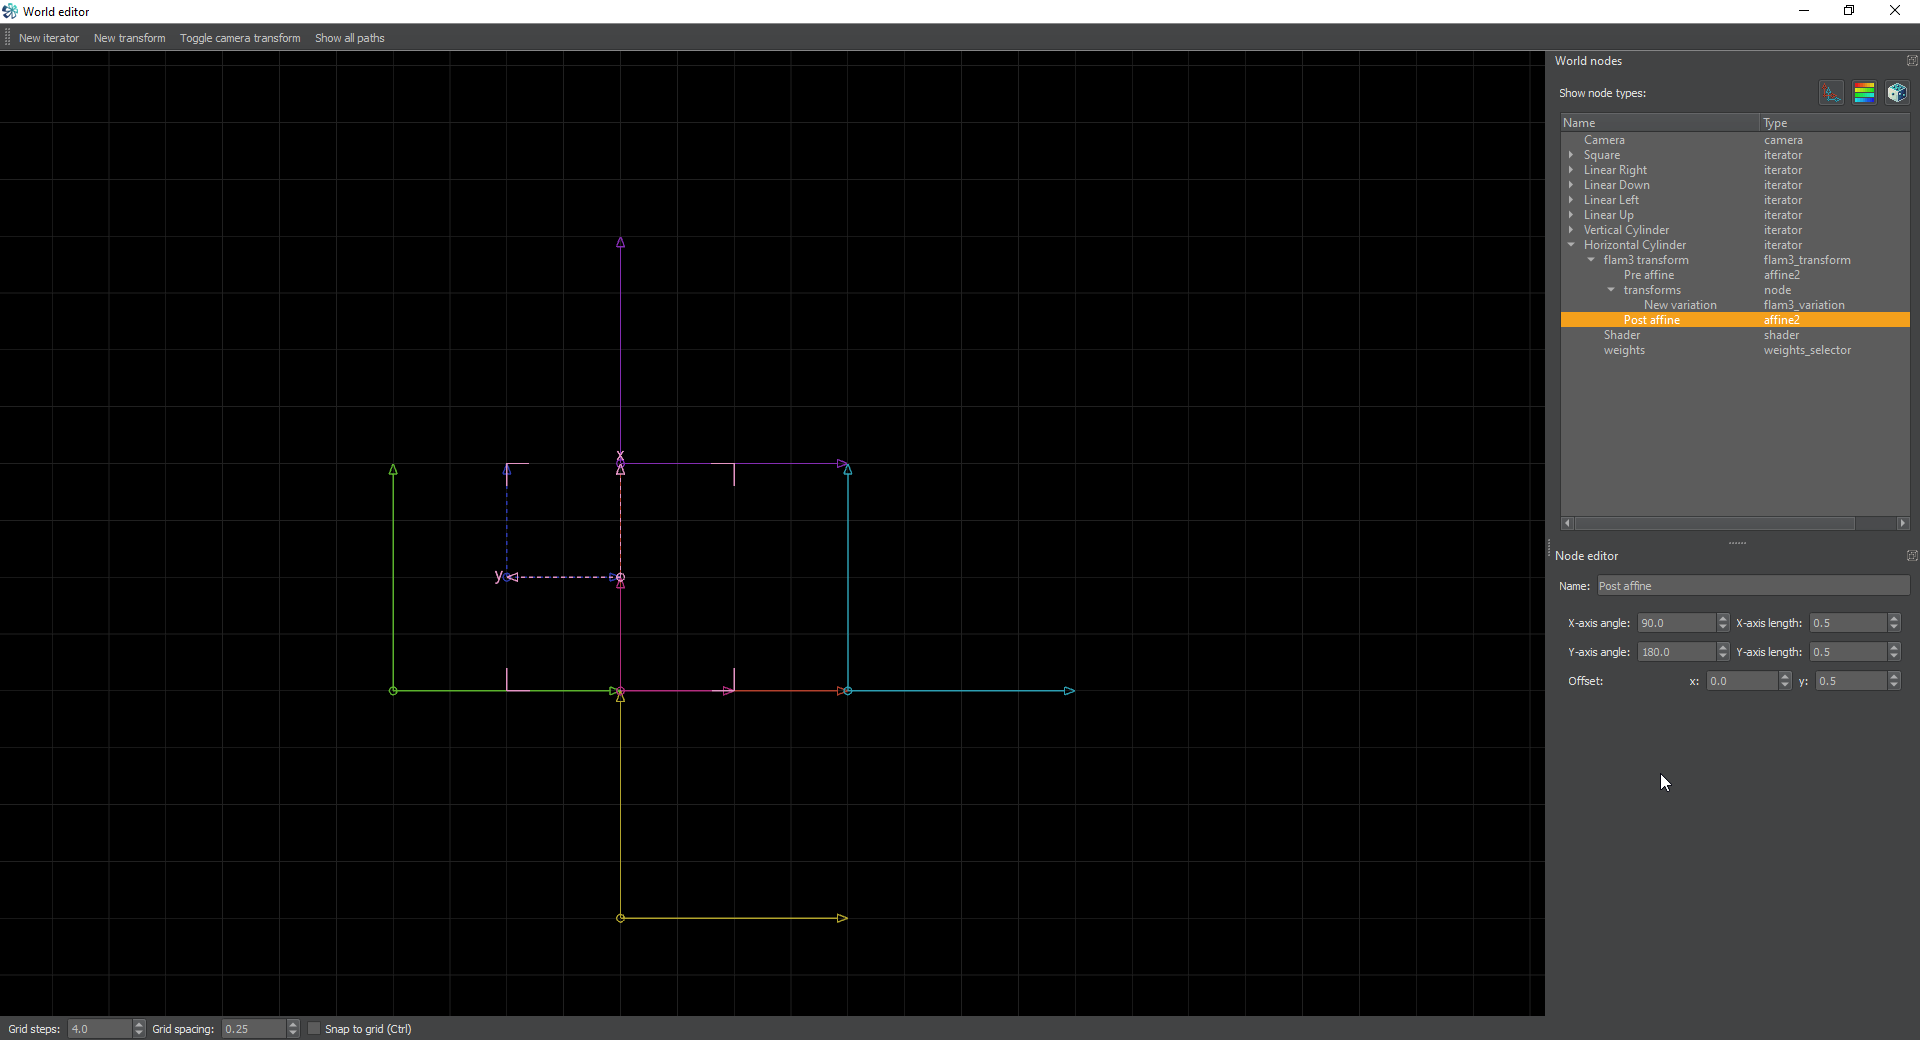
Now, notice how the cylinder overlaps with the squares. We’re going to fix that. First, I’m going to change the x and y axes in the pre-affine to 0.5 instead of 1.0 length. Then I’m going to add a post-affine and do the same thing. Then I’ll offset the post-affine -0.5 on the x axis so that it falls into the space between the squares. I find that doing this gives a better look to the cylinders.
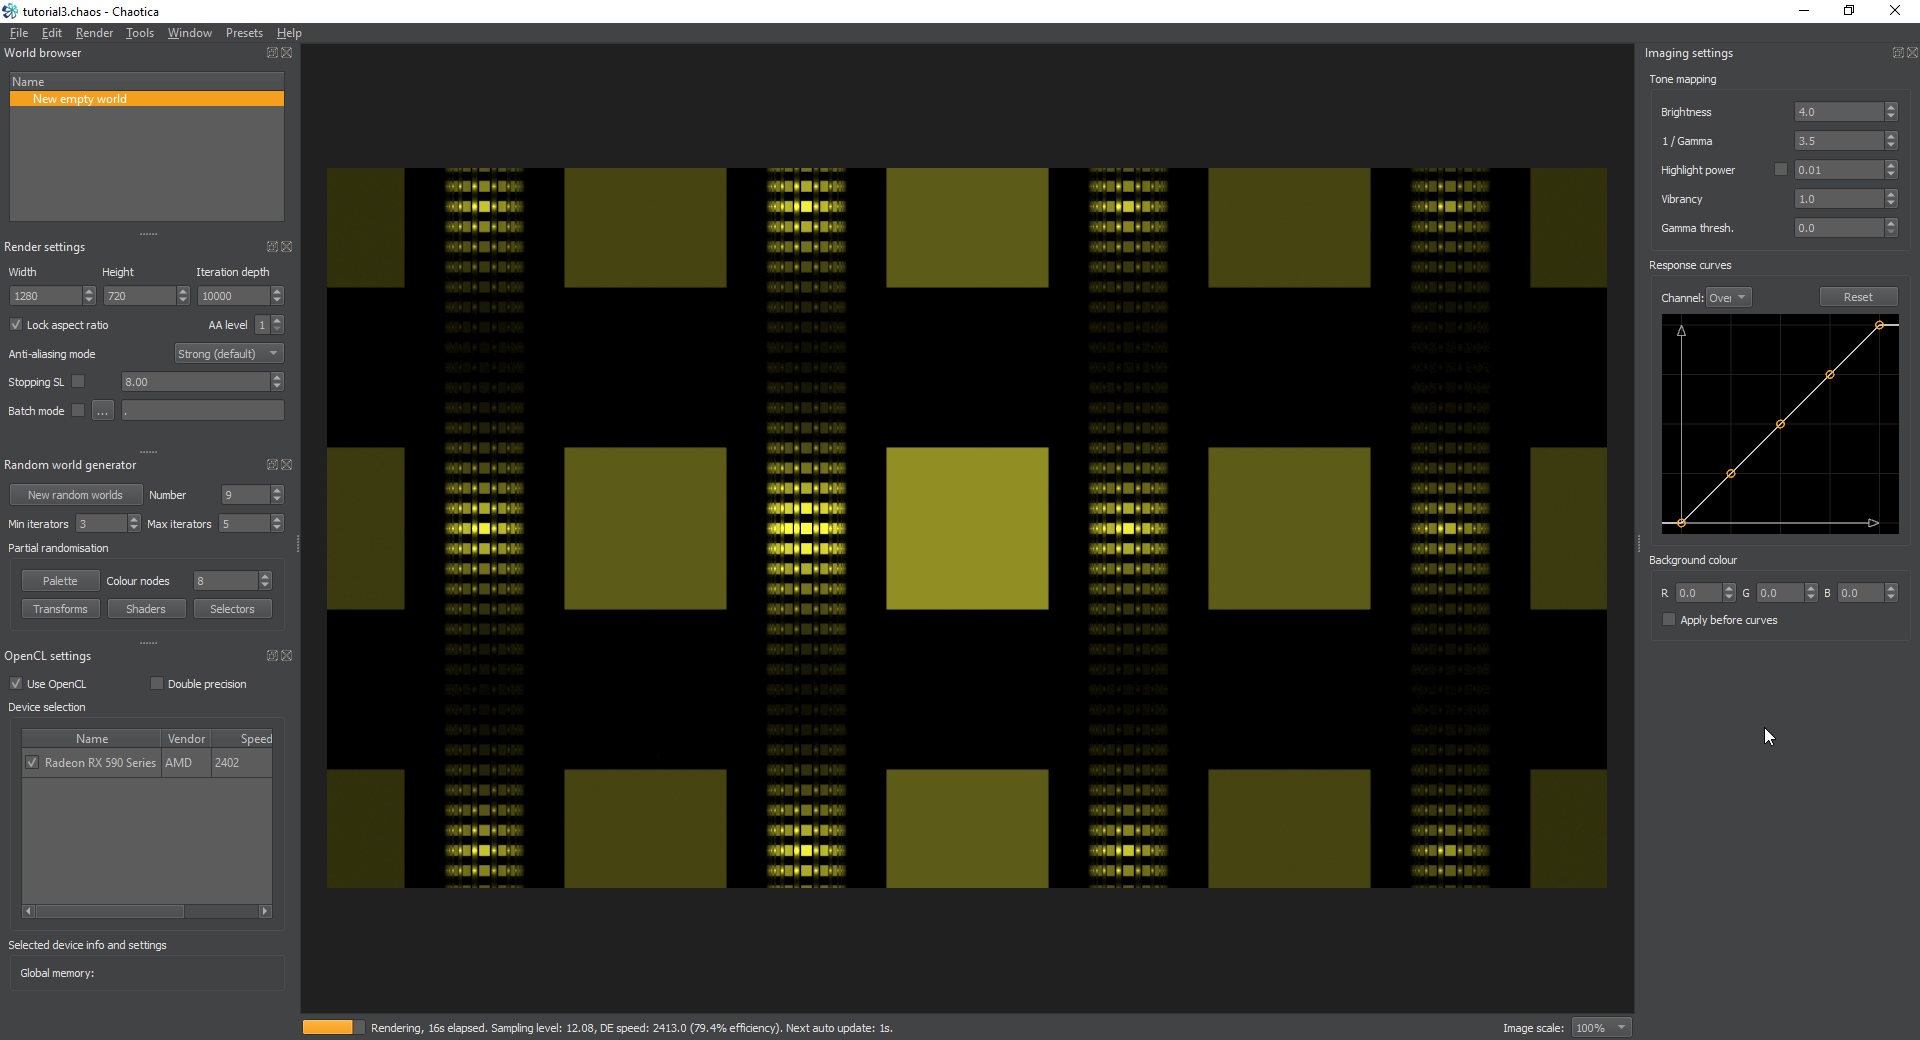
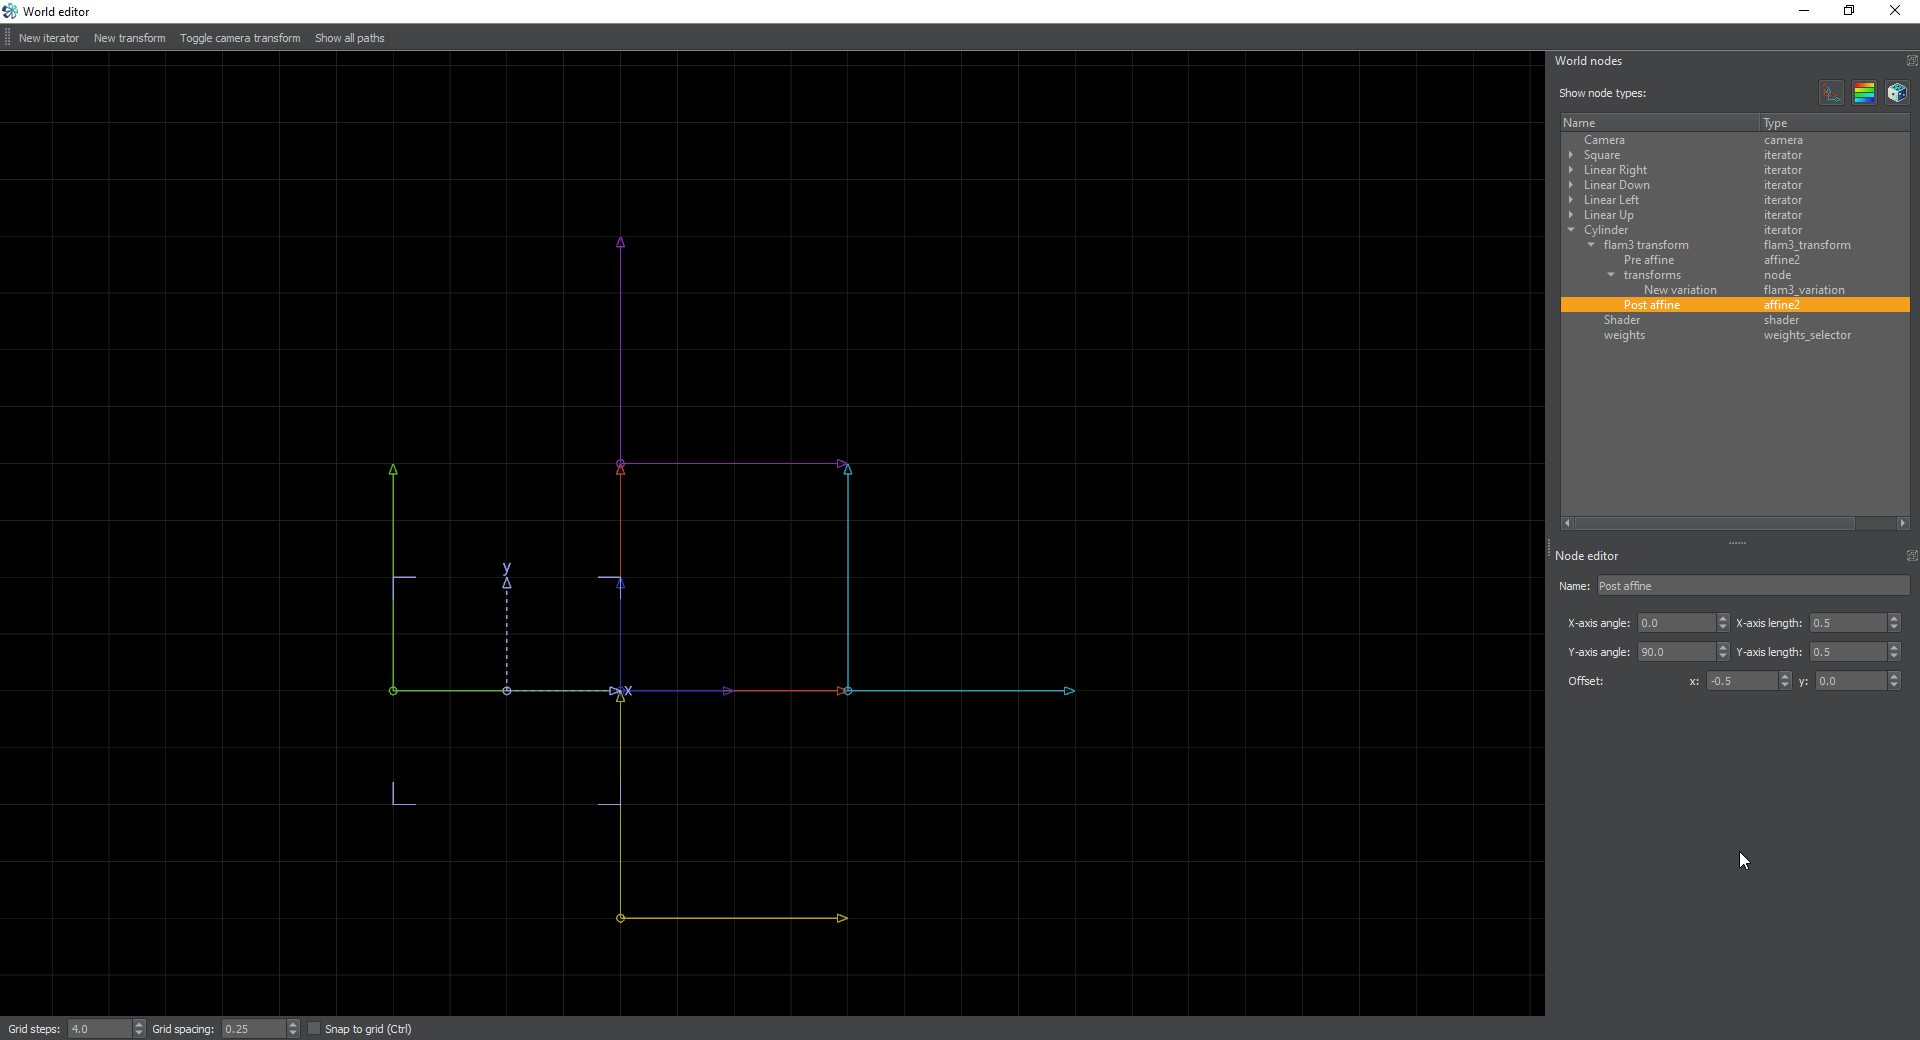
Next, I’m going to offset the post-affine for this cylinder in the y axis by 0.5 This moves the bright spot to a diagonal away from the square.

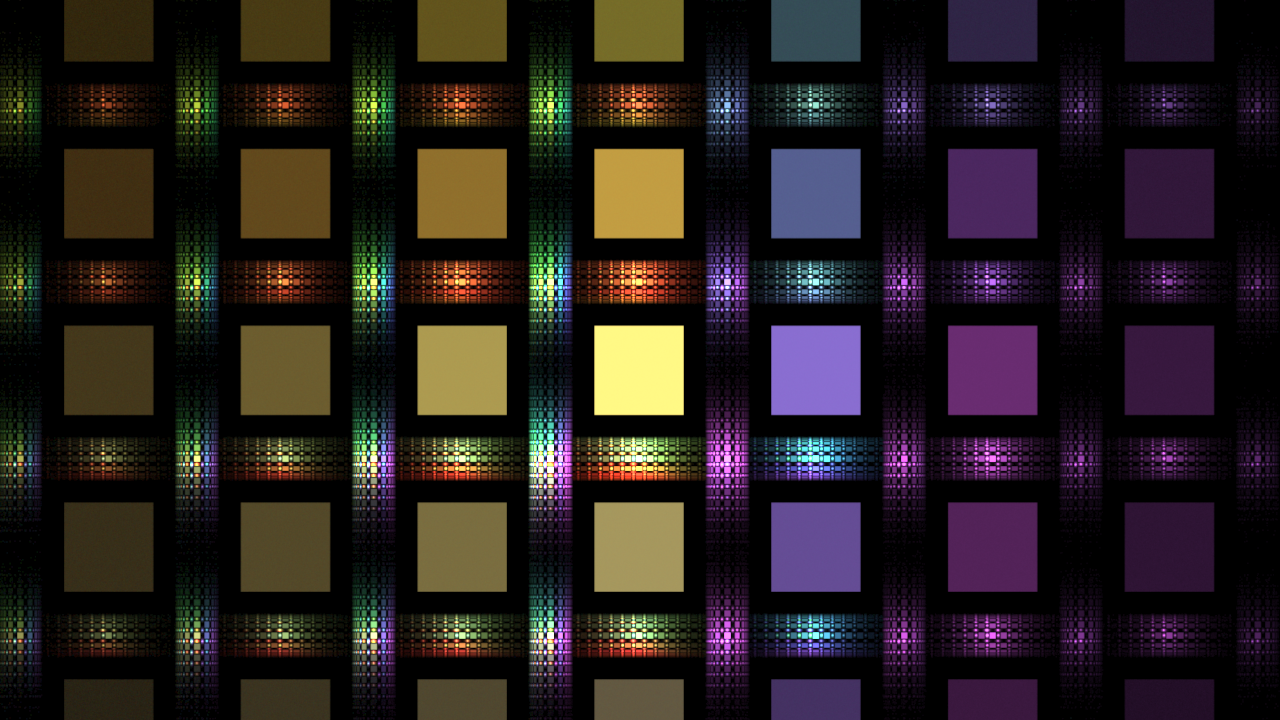
That’s looking better. Now we need a horizontal cylinder. Notice though that the cylinder is made up of smaller copies of the entire image. It’s so freaking cool to me. As you build this structure, notice how the cylinders change to reflect the overall image as a whole.
Next I’m going to create a new cylinder the exact same way with the value set to 0.25 like before. This time however, I’m going to rotate it 90 degrees on the post-affine and offset the y-axis on the post-affine by 0.5.
Finishing up
This gives a bit of a crosshatch look, which I tend to enjoy. At this point, I suggest saving the world so you can come back here later on. Now, from here there’s several things we can do. The most obvious is changing out the square for something else. I suggest playing with it. There are many options available. You can also play with the base weights of the linear transforms to get a brighter pattern. Finally, you could play with the camera transform. Unpolar, tanh, and foci work well with a linear tile though foci and unpolar take a bit of tweaking to make it work.
I’ll leave you with a final image with a random shader applied and a random pallete applied.
Hint: For foci or unpolar resizing the affine by variations of pi/3 tend to work wonders.
Examples
At this point though, where you take the fractal is up to you. I’ll leave you with a few examples of what I have created with this method.